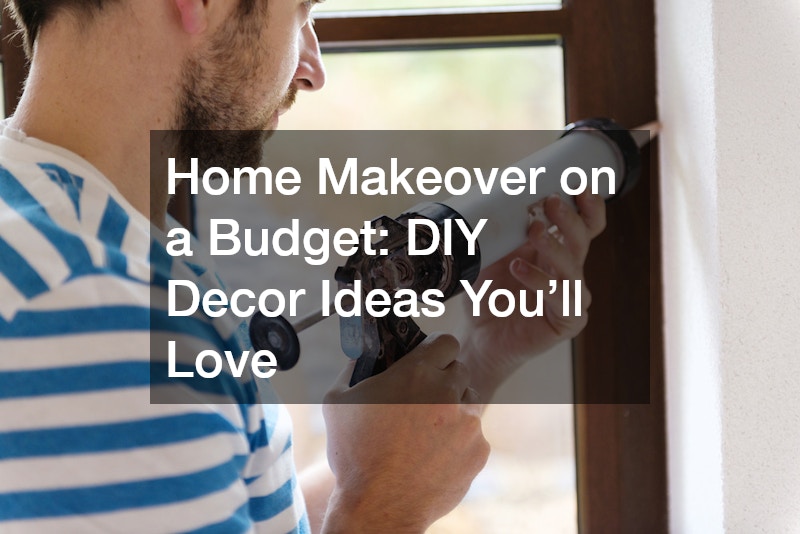
A home that is beautifully decorated gives you the freedom to welcome guests and a sense of satisfaction. Most often, a rustic aesthetic, a modern aesthetic and a relaxing vibe in your home come with a high price tag. There are many DIY home decor ideas you can use to enhance your property for a low price.
Create Custom Signs
Interior signs are used to advertise, but they also enhance the aesthetics and feel of a home. You can choose wall graphics, murals and other indoor signs to transform the look of your home instead of painting it. You should always consider your personal style and preferences when creating custom indoor signage. Interior signs are a great alternative to paint and wallpaper because they offer endless design options.
Vinyl murals are removable, so you can redecorate rental spaces that don’t allow permanent modifications. Wall graphics are a great way to add accent walls to your home.
Custom interior signs are a great way to add an individual touch to your home. They reflect your taste and style. To create custom signs, you should first make an inspiration board. Online, you can find interior signs that are appealing to you. You can also use magazines to choose a color scheme that suits your personality.
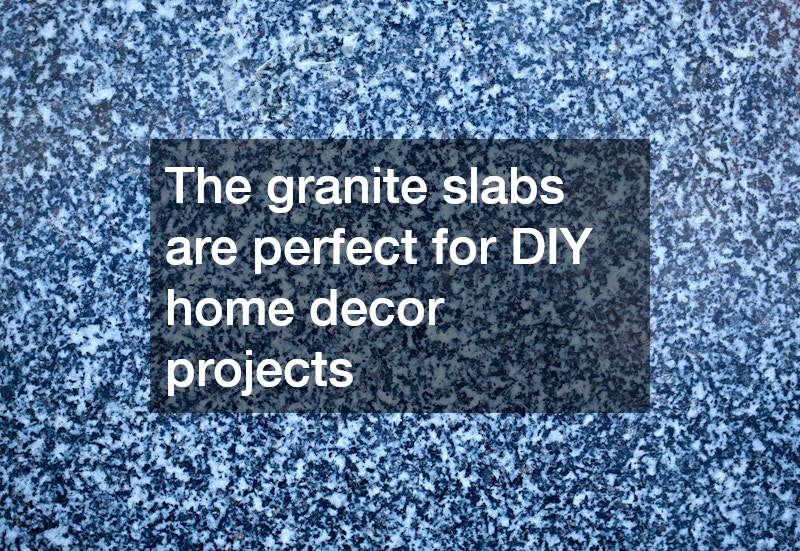
Build Granite Shelves
Granite is an igneous stone that has many uses in the construction industry. Granite is used to make flooring tiles, walling blocks, kitchen counters, shelves, paving stones, monuments, and paving stones. The granite slabs are perfect for DIY home decor projects because they’re fire and decay resistant.
DIY granite shelves can be lightweight and simple to install. You’ll need self adhesive film, wood pieces, gold brackets or MDF. Also, you will need a pencil and ruler, a filler spreading tool, scissors, or a razor. Follow these easy steps once you’ve got your materials:
- To ensure that the shelves are as smooth as possible, cut the shelves to the dimensions you require.
- With a ruler, draw a line straight down the length of the wood.
- Wrap the vinyl adhesive around the shelf, leaving 3cm extra. Then, cut the excess with scissors.
- Remove 2cm from the backing of the vinyl adhesive, and press the edge against the pencil line.
- Smooth any bubbles or bumps from left to the right until you have a flat surface.
- Repeat the process by removing the self-adhesive film until both ends are met.
- Apply adhesive to the end of the shelf.
- Fold the short edges of each shelf and make small slits in each corner.
- Then use the spreader to smooth all the edges.
Then, choose the brackets you want to use and mount them on the wall.
Concrete Countertops
Concrete countertops have become a popular choice for homeowners who want to upgrade their bathroom or kitchen decor. It may be intimidating, but building a concrete countertop can be a rewarding and challenging DIY project. If you’re a beginner, it’s important to have a project plan with basic color treatments and simple edges.
Consider using a mold that is leak-proof and robust to pour concrete for your countertops. Concrete cures in about a week. Work in a place where there will be little or no disturbance to the countertop.
Start by measuring your countertop and cutting a 1″ thick piece of melamine particleboard. A circular saw is used to cut it precisely according to the size of your counter. Drill pilot holes in the corners of the mold. Insert a jigsaw and cut along the edges. Attach the side pieces to the cutout by pressing them up against the edge of the base.
Apply a thin bead of 100% silicon caulk at all interior corners and seams after the mold has been completed. Spread the caulk with a caulking stick or your finger and let it dry for 24 hours. Then, build a frame around the outside of your mold and prepare the galvanized stucco reinforcing wire needed to reinforce the countertop. Let the concrete cure after pouring. Install it in the kitchen or bathroom after applying a beeswax and masonry sealer.
Install Plantation Shutters
Plantation shutters are a timeless addition to any home, offering both aesthetic appeal and practical benefits. Unlike traditional blinds or curtains, they provide superior light control, insulation, and privacy while adding a touch of sophistication to your windows. Their adjustable louvers allow you to regulate natural light without compromising privacy, making them an excellent choice for bedrooms, living rooms, and even kitchens. Additionally, plantation shutters are durable and easy to maintain, as they collect less dust than fabric window treatments and can be wiped clean with a damp cloth.
When installing plantation shutters, accuracy in measuring your windows is crucial to ensure a perfect fit. Inside-mount shutters sit flush within the window frame, creating a sleek and built-in look, whereas outside-mount shutters extend beyond the frame, making a bold statement but requiring more space. The installation process involves securing the shutter frame to the window opening and attaching the panels with hinges, allowing them to swing open and closed with ease. With the right tools and careful planning, installing plantation shutters can be a rewarding DIY project that enhances your home’s charm and functionality.
Display Travel Pictures
Travel photos can be displayed in your home to keep your memories alive and add a personal touch. Print your photos of sightseeing and display them at home. Two of the most popular ways to display travel photos are by creating a gallery and designing a map. The most popular and best option is to create a travel wall.
Create a travel gallery wall by mixing and matching different media and photo sizes. You can choose a theme such as your favorite beaches, dive spots or mountains that you have climbed. You can also create a map of your best adventures. This is a unique way to show off your photos. It makes a wonderful gift.
Declutter
Decluttering your home can be overwhelming and stressful. But it doesn’t need to be that way, as there are many junk removal services., such as less cleaning, less organization, less stress and debt, greater financial freedom and more energy to pursue your passions. Consider decluttering to live a minimalist lifestyle, which will help you save for emergencies.
You can declutter by giving away or organizing one item a day for five minutes. You can also create a checklist or declutter by filling a trashbag with things you don’t need.
Try the 12-12-12 challenge. A second strategy is to view your home from the perspective of a new visitor, and identify areas that need organizing. You can also ask a friend to help you sort the items into trash, donate, keep or relocate. Keep in mind that you want to declutter your life by taking the first step with motivation and excitement.

Turn a Doorway into an Archway
A doorway with an arched opening adds elegance to your home. It is relatively easy and inexpensive to build one, and only requires a few simple tools and materials. Mark half the distance between the studs on the 1/2′ plywood. Secure a screw to the mark and tie a string at one end. Then, hold the pencil at the end. After the arch kits have been drawn, use a straight edge to trace along the top and sides of the kit. Then, cut along the curve using a jigsaw. You should have two pieces after cutting the straight lines using a circular or jigsaw.
Then, measure the width of the door opening, which is typically framed with 2x4s. Due to the 1/2′ thickness of the plywood, the 2x4s must be ripped down to 2.5′ in order to match the width of the door framing. Sandwich the blocks together after ripping. Attach each arch on both sides using 3′ screws. It is important to pre-drill these holes, in order to prevent the 2x4s splintering.
Attach a drywall or cement panel to the wall and then cut the opening on the opposite side. Mesh tape and thin set finish are needed for the seams. The same method is used on a larger scale for the arched wall alcoves. The vanity wall is constructed from two 8′ sections cut at 1/2′ and connected with 2x4s that are cut to the required depth. For the tub wall, it may be necessary to assemble the alcove in place. To blend the drywall, score along the back edge. Finish with mesh tape and thin set before covering with microcement.
Display Art Projects
DIY home decor projects include displaying artwork because it gives a space personality. Displaying framed art on a wall is one way to show off your artwork. Begin by raiding thrift stores for frames. Then, paint half of the frames gray and half yellow. Create your mats and lay them out on the ground until they look good. Take a picture to hang on the wall.
A floating frame collage is another way to showcase art camps. This method uses floating frames with tasteful black and white frames. The floating frames in the middle give the exhibit a light, clear appearance, which keeps it from looking too busy. This technique allows you to mix sentimental items and things that are interesting to look at such as photos of your family.
Washi tape can be used to decorate the walls of a child’s or office at home. Use it to add visual interest to the room. To accent your decor, you can display your artwork in a stand for music or a frame that is usually used to hold family photos. Use a book stand or cookbook stand to display artwork or pin it on a bulletin board. No matter what you choose, make sure that the display showcases your artwork in a creative way.
Polished Concrete Floors
Polished concrete floors are a durable and stylish flooring option that can enhance the look of any home. The process involves using chemical treatments to harden the concrete, followed by a series of grinding stages with progressively finer grit levels. This technique smooths the surface, removes imperfections, and achieves the desired level of sheen. Polished concrete is not only aesthetically pleasing but also low-maintenance, making it an excellent choice for high-traffic areas. Additionally, it is resistant to stains, moisture, and general wear, making it a long-lasting and cost-effective flooring solution.
There are two primary methods for polishing concrete: the dry polish method and the wet polish method. The dry method produces a high-gloss finish and minimizes water usage, with dust controlled through vacuum systems. The wet method, on the other hand, incorporates water at each stage of the process, reducing airborne dust and resulting in a softer, satin-like sheen. While both techniques are effective, the choice depends on the desired finish and environmental considerations. Homeowners should weigh factors such as maintenance needs, indoor air quality, and the level of shine they prefer when selecting a polishing method.
While DIY concrete polishing is possible, it requires specialized equipment such as concrete grinders, polishing pads, and high-quality abrasives. The process can be time-consuming and physically demanding, making it a better option for those with experience using heavy machinery. Hiring a professional is recommended for large-scale projects or if a flawless, high-gloss finish is desired. Professionals have the expertise to ensure an even, well-polished surface and can apply protective sealants to enhance the floor’s durability. Whether done independently or by an expert, polished concrete floors offer a modern, sophisticated look that complements a variety of home decor styles.
Display Paper Crafts
Paper crafts can be a great way to add some creativity and flair to your home decor. They are also inexpensive. Cardstock and patterned papers are great for creating a variety of crafts. You can also use decorative papers to make DIY home decor and embellishments for paper crafts.
Craft punches can be used to cut shapes out of patterned or decorative papers. You can create decorative garlands and cupcake pictures, as well as dimensional embellishments. You can create rosettes that are accordion folded and can be used for many different purposes. You can use them to make garland, wreaths and bouquets or as photo backgrounds.
You can also use cardstock or patterned papers to make gift bags and boxes. Use a scoring board to create miniature gift boxes, or print out a template on a sheet of beautiful cardstock. You can also find free patterns online and print them on pattern paper for cereal box covers or larger gift bags. Paper crafts are easy and fun to make, so grab your scissors and enjoy these DIY home decor ideas.